Setting up Netbeans IDE for Synfig Development
Prerequisites
Clone synfig repo
Execute
1-setup-<your-os>.shscript to install build tools and dependenciesInstall Oracle’s Java 8 or Open JDK v8
Note
TL;DR You can also refer to this video tutorial -> https://youtu.be/op-PShrJTCM
Installation
The Apache Netbeans IDE is recommended for Synfig Studio development. The Installer automatically prepares the IDE so that it comes with all required plug-ins, the correct workspace encoding settings, pre-configured code formatters and more. Simply follow these steps:
Download the Netbeans Installer.
Launch the Netbeans IDE and go to tools -> plugins.
Go to Settings tab and enable Netbeans 8.2 plugins portal:

Go to Available plugins and click on check for newest.
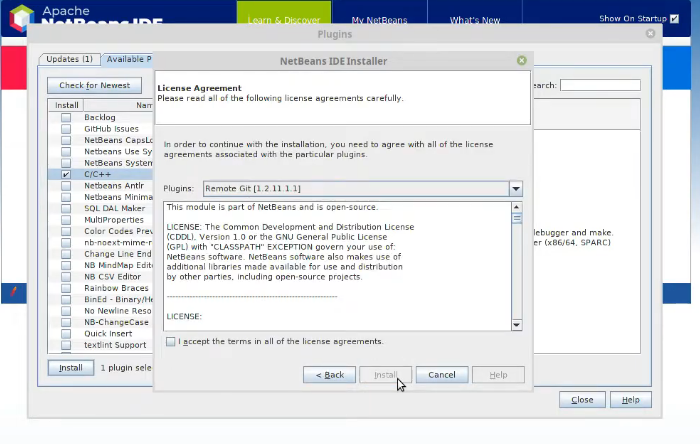
Now select and install C/C++ plugin:
Setup New Synfig Project
IDE Installation is now completed so let’s configure our new synfig project.
Click file -> new project
Select C/C++ and C/C++ Project with Existing Source:

Select your synfig source file directory
Under Select configuration mode select custom and press next:

Click next and skip the Pre Build Action(do not check any option).
Under Build Action uncheck the clean and build after finish and click next:

Now click next on step 5 and step 6 without making any changes.
Click finish:

Setting up make configuration
Now we will configure make settings for our synfig project.
Right click on project(Synfig) and select properties:

Under Build -> make section change Build result so that it points to “_debug/build/bin/synfigstudio”:

Press apply and ok.
Yay! your Netbeans IDE is now configured and you can use all the functionalities including debugging etc.