Setting up QtCreator IDE for Synfig development
Prerequisites
Clone synfig repo
Execute
1-setup-<your-os>.shscript to install build tools and dependencies
Installation
For Linux users, you can install qtcreator using your distribution’s package management tool.
For Windows and Mac users, you can download and install open source version of qtcreator from Qt’s official website.
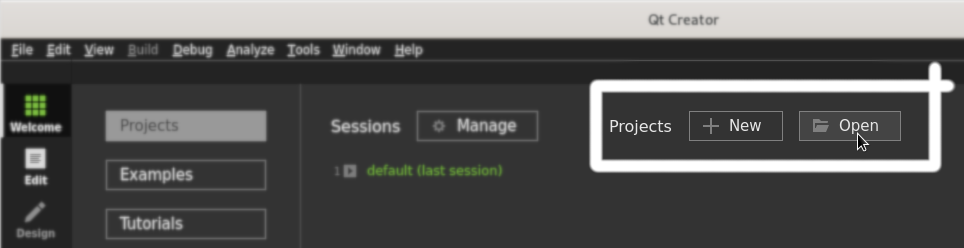
Setup new Synfig project
Select Open project
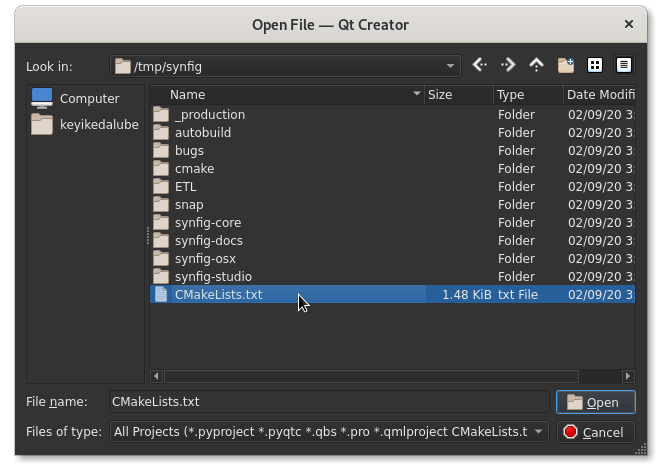
Browse and select CMakeLists.txt
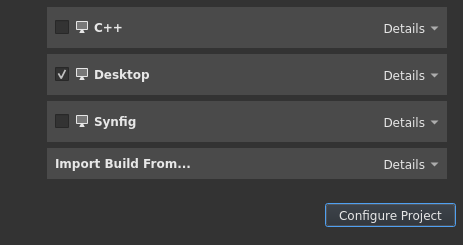
Manage your kit
For most users, you can select and use the default kit usually named Desktop.
But if you want to use another generator (say Ninja) and not the one provided by the default kit (Makefiles), you can create your own kit and name it Synfig or any other name of your choice.
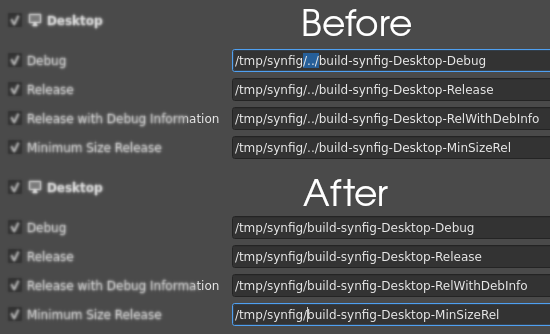
Manage your build path
QtCreator tends to generate build directory above our source directory. If that’s OK with you than you can skip this part and proceed with Configure Project.
But if you’re someone who has multiple projects inside your preferred root project directory, QtCreator generating build directories in our root directory might become messy later in the future because you’d have to deal with multiple directories as your project lists grows. Once you’re done, select Configure Project.
Setup make configuration
Set processor count
Depending on your generated build files, the build system might utilize parallelism during build process or it might run only on one CPU. If you want to control the number of CPUs to be utilized by CMake during build process you can set it from Projects > Build > CMake arguments. For instance, if you’ve a quad-core processor, you can use -j 4

Change run configuration
QtCreator, by default, sets synfig_bin to be run as our output but usually we are testing the GUI frontend so change it to synfigstudio from Projects > Run > Run configuration

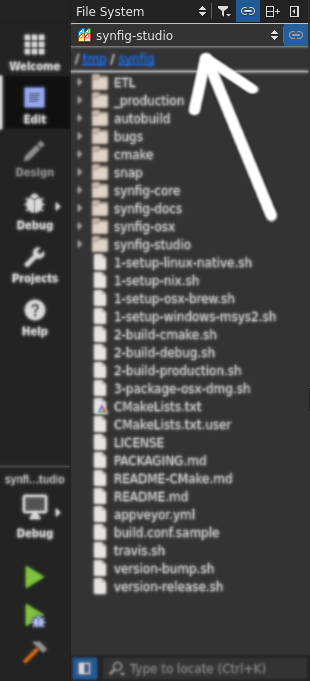
File browser
File system
To browse your project files, change File System sub-menu from Computer to synfig-studio. That way you’ll be able to see all the source files, resources, translation files, etc as it is in your file system.
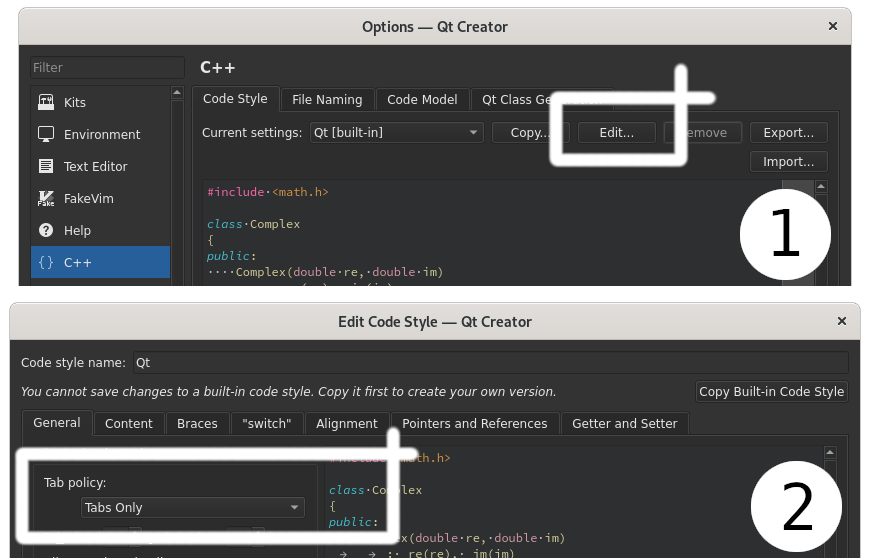
Source code indentation
Use tab character
Synfig source files mainly C++ and CMake use tab character for indentation. QtCreator might use spaces by default depending on platforms or versions. Change C++ code style settings to Tabs Only. You could also duplicate built-in settings and make changes to preserve default settings.
You’re all done :) Happy hacking!